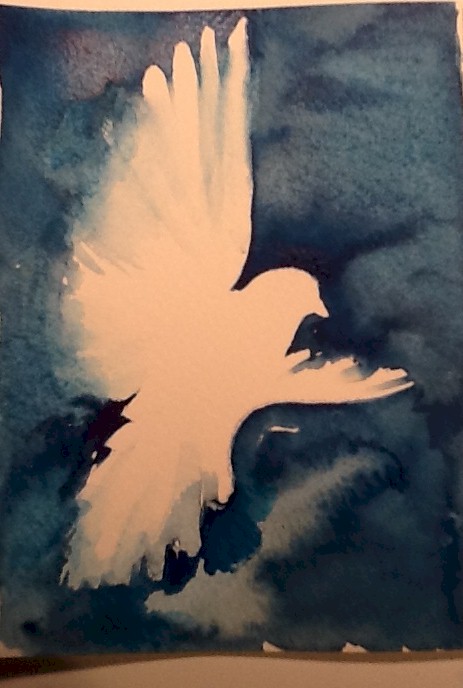
Watercolor Holiday Card
Drawing the Dove
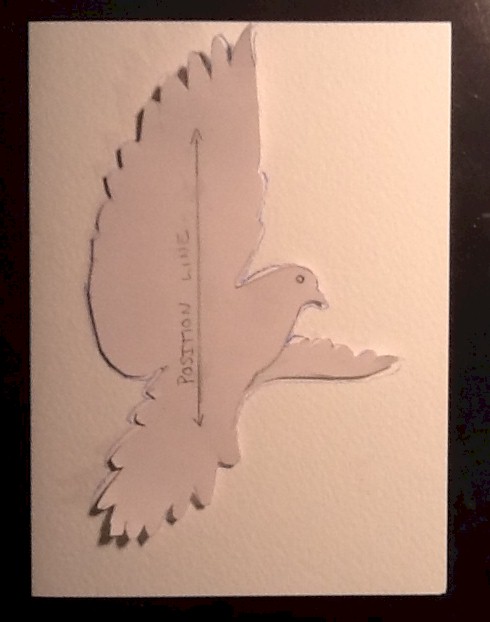
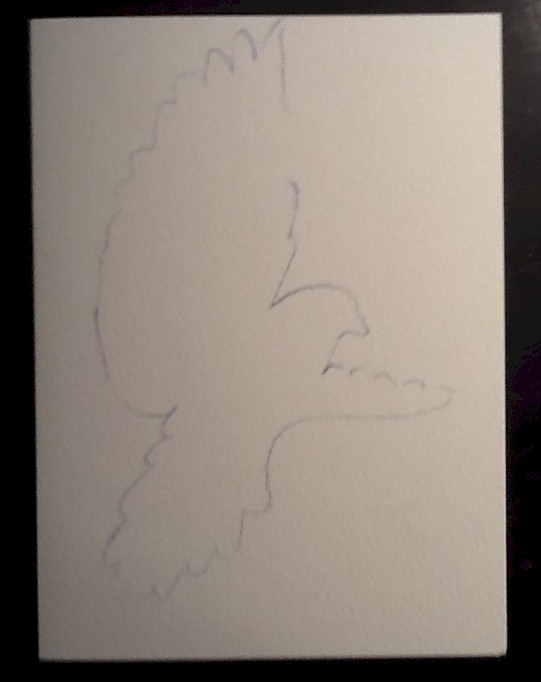
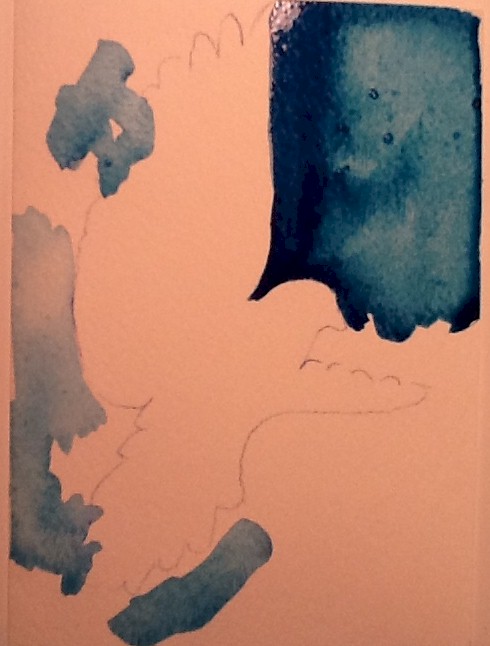
This card was painted on Strathmore Watercolor Card which are 5″ x 6-7/8″ and 140# . Begin by positioning the dove template as shown on the left. When you have traced the dove image, it will look like the right side. I use a watercolor pencil to trace the design.
Paint with Clear Water
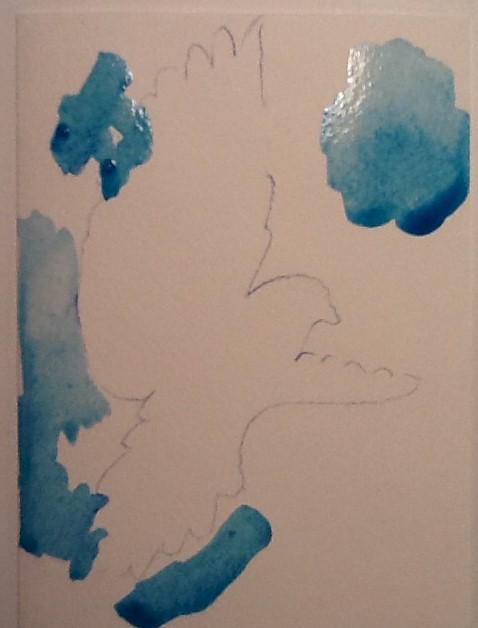
The first step to painting this card is to wet with clear water certain parts of the card. I have shown the areas to wet using a light blue paint but you should USE CLEAR WATER.
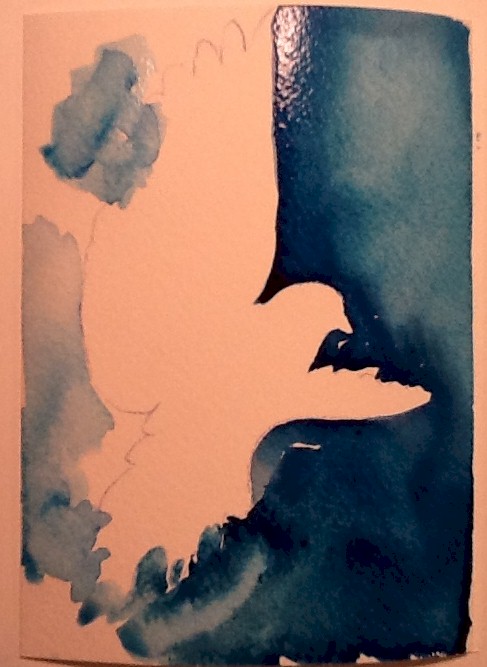
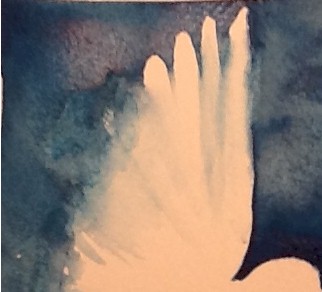
Dark Stroke Around Head & Top Right
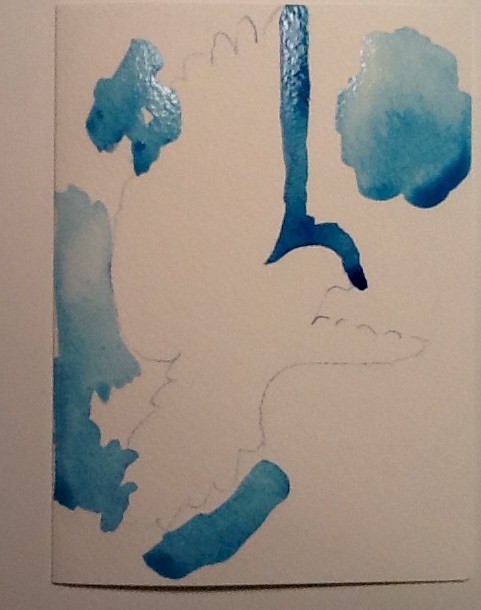
With the dark blue paint, in one careful stroke, paint around the head. While the paint is still wet, continue the top quadrant using the dark blue but add a medium blue for variation where the clear water was (in the middle area).
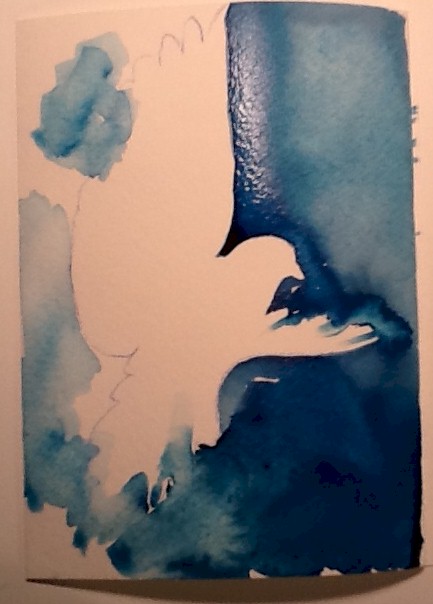
Bottom Right Quadrant
Continue to paint dark blue under the beak and around the bottom wing. Use a lighter blue close to the tail. Before the paint dries, rinse your brush and, when damp, touch 2-3 areas at the top of the wing and stroke toward the body about half way so that the edge softens (right photo).
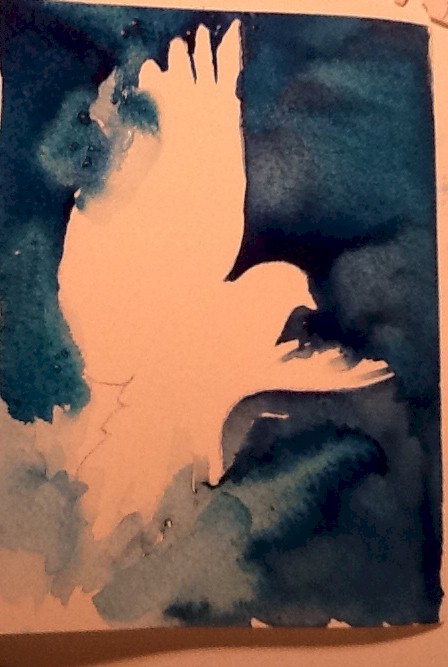
Continue Painting Around Dove
Try to quickly paint all around the dove. If the clear water areas have dried, re-wet. Where the clear water meets the paint, it will blend. If it creeps in too much, use a paper towel to blot. As you are working, you can blend with clear water and make the suggestion of feathers as shown on the tail and top wing (right).
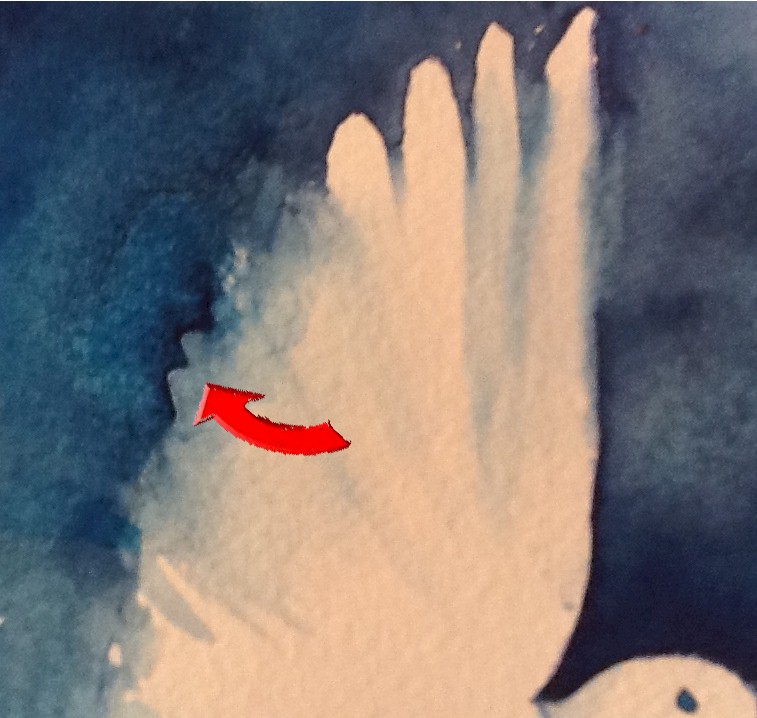
Touch Up & Define
There will be some messed up areas that need fixing up. One way to accomplish that is to go back in with dark paint. See the image below where I outlined the messy area of the top wing. Make sure the painting is dry (use hairdryer) and then paint the outside with clear water. I painted clear water on the left side from the edge of the card part way to the repair area on the wing. Then I used very dark blue paint and painted around a few feathers (2-3) and let the paint flow/blend into the clear water. Another way to touch up is to use a small, stiff brush dampened with clear water to lift off the blue paint and and make feather edges. Do not try to make it too perfect. The loose, free look is what gives this painting it’s style.
Paint the Body
The final stage for this painting is to paint the body with light blue paint. Paint the belly and then, with a damp, clear brush, blend the top edge into his body so that is soft. Leave the bottom edge hard (no clear water). Paint a small shadow under the beak and along his neck. Paint under the top wing and blend down into the body. Paint a little shadow where the bottom wing meets the body. Paint his eye. You might need to let this dry and paint a second layer to darken the bottom of his belly and under the top wing even more.
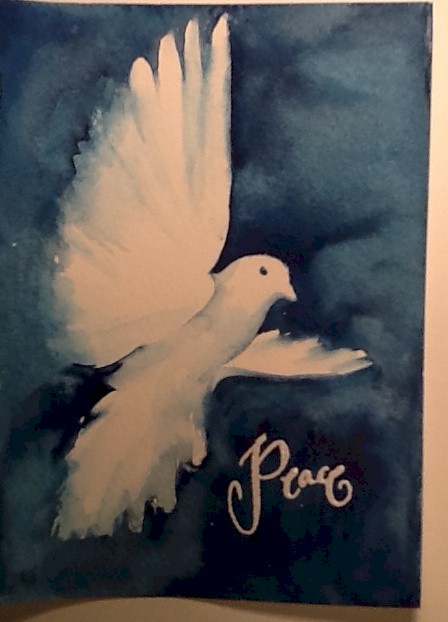
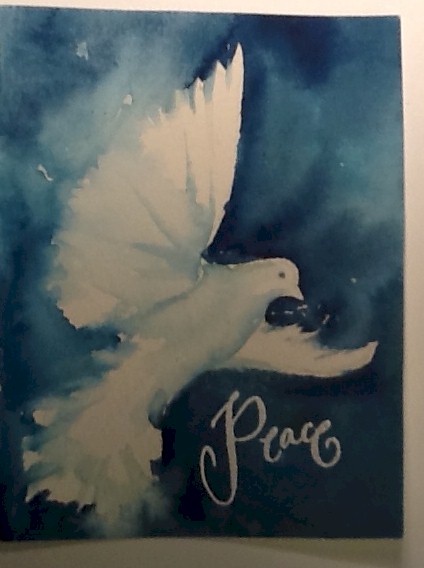
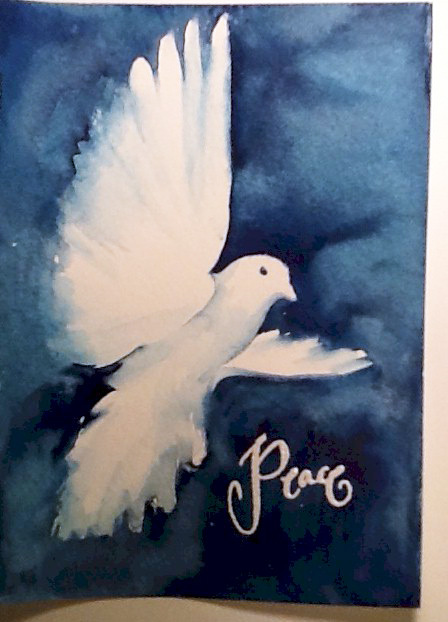
I used a white Peace stamp and white embossing powder to make the “Peace” wording stand out. You could use white paint if you don’t have those supplies. Below, left is the final image from this demo. The right side shows a different painting I did of the same subject. No two paintings will be exactly alike!